You're a 34-year-old intermediate guy coming back after a break, training 4 days a week with a full gym. The main mission is building muscle, with a secondary nod to strength, while running a moderate calorie deficit to drop fat at the same time. You've flagged a stiff lower back, so heavy hinging and loaded spinal flexion get swapped out for spine-friendly alternatives throughout. Back and arms get extra volume priority, since those are the areas you want to develop most. At 2000 kcal a day you're in a sensible, sustainable deficit that protects muscle while fat comes off, and the split (Back, Arms, Lower, Push across Mon-Fri) keeps your muscles hitting the sessions fresh with plenty of recovery built in.
Because you're returning after a break, the first two weeks are deliberately conservative. Drop starting weights or difficulty by roughly 20-30% from where you think your working level is, cap sets at the lower end of the prescribed range, and keep a clear 2-3 RIR on every set. Connective tissue and the neuromuscular system take longer to recondittion than cardiovascular fitness, so this isn't a waste of time, it's what prevents the first week of enthusiasm turning into a two-week setback. If sessions feel very easy, that's correct. Week 3 onwards you ramp into full prescribed intensity and volume.
Four training days across the week, organised around your priority muscle groups, with three full rest days giving your joints and lower back enough time to recover between sessions.
Set the chest pad so your torso is fully supported and your feet are flat on the floor. Grip the handles with a neutral grip. Initiate the pull by retracting your scapulae first, then drive your elbows straight back toward your hips. Hold the peak contraction for a full second, then lower with control over 3 seconds. Avoid shrugging your traps into the movement.
Why this exercise: The chest-supported position offloads your lumbar spine entirely, making this the safest heavy back-row option given your stiff lower back, while still delivering the horizontal pulling stimulus your back needs.
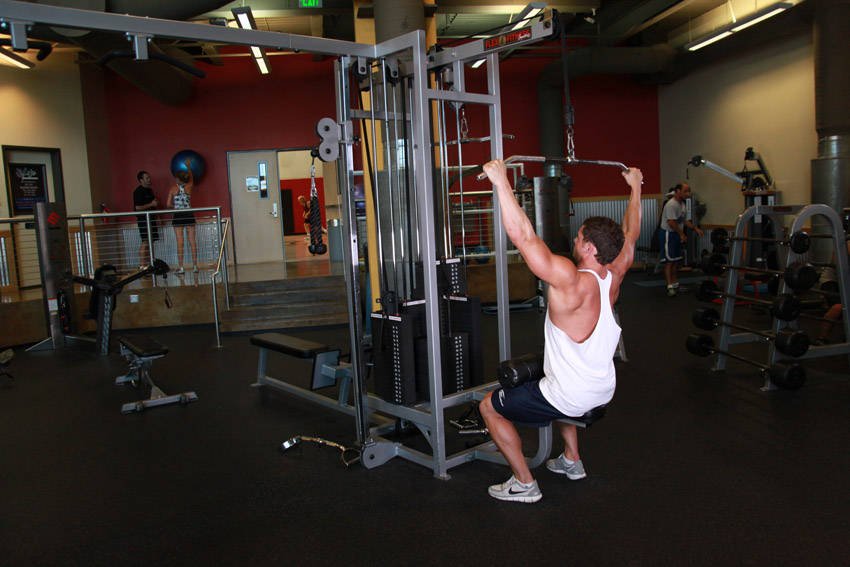
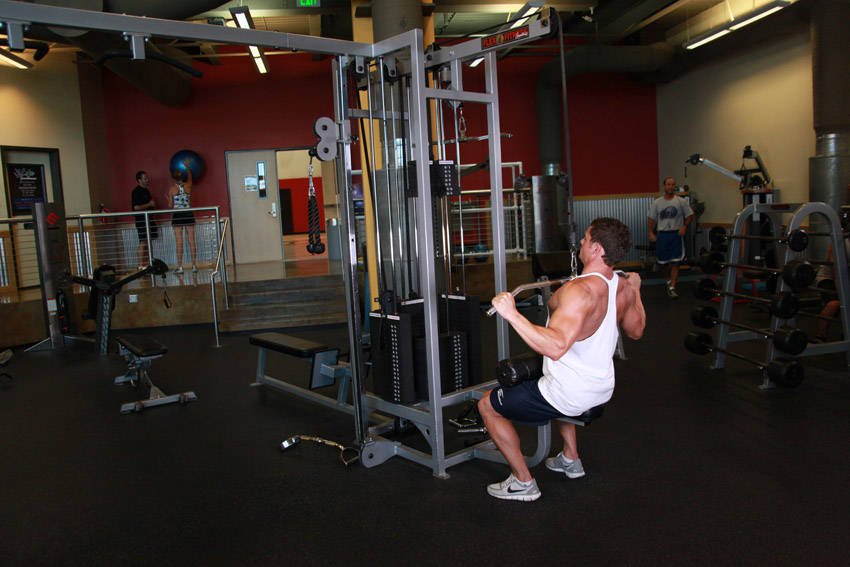
Watch a video →Sit with your thighs locked under the pad, torso slightly inclined back (about 15 degrees, no more). Start from a dead hang with scapulae elevated, then depress and retract them before you bend your elbows. Pull the bar to your upper chest while keeping your elbows driving down and back. Lower the bar with full control, feeling a stretch at the top.
Why this exercise: Vertical pulling complements the horizontal row and emphasises lat width, a key contributor to the back development you're prioritising this block.
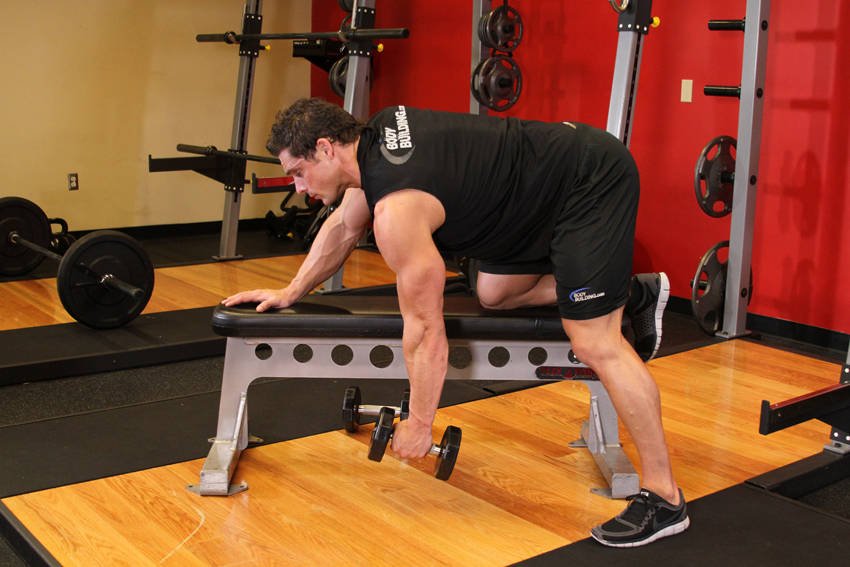
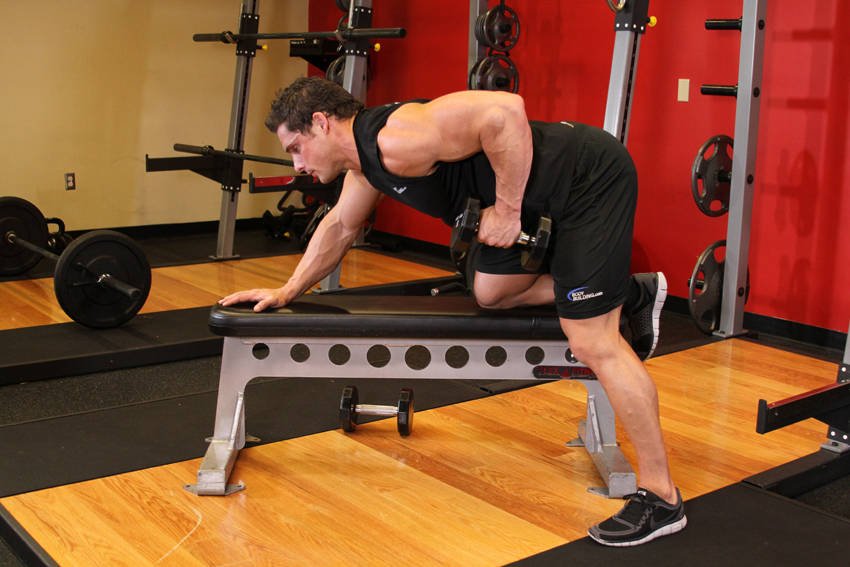
Place your same-side knee and hand on a flat bench for full support. Let the dumbbell hang with a neutral grip, then pull it toward your hip rather than your armpit, keeping your elbow close to your torso. Your torso should stay parallel to the floor and completely still. Lower slowly over 3 seconds and feel the full stretch at the bottom before each rep.
Why this exercise: The bench brace eliminates spinal loading almost entirely, allowing heavy unilateral pulling work without aggravating your lower back, and the hip-path targeting the lower lats fits your back-focus day well.
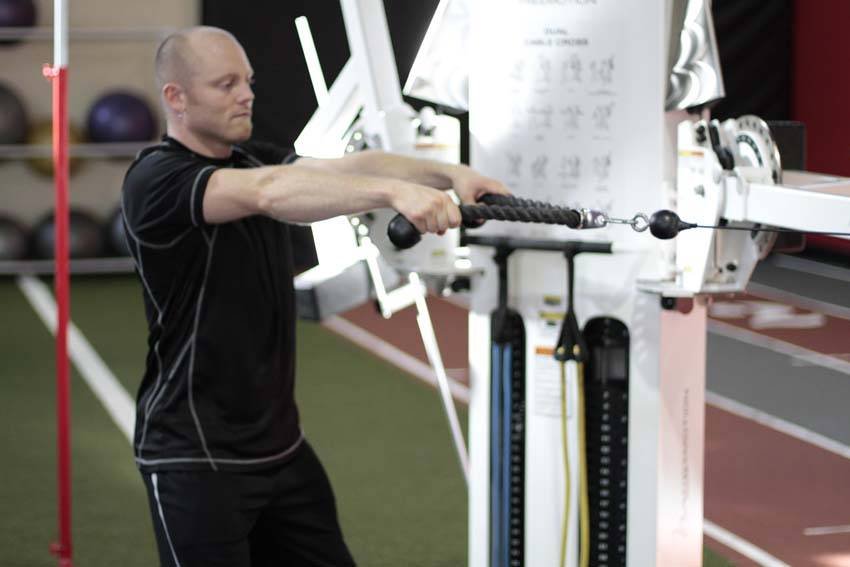
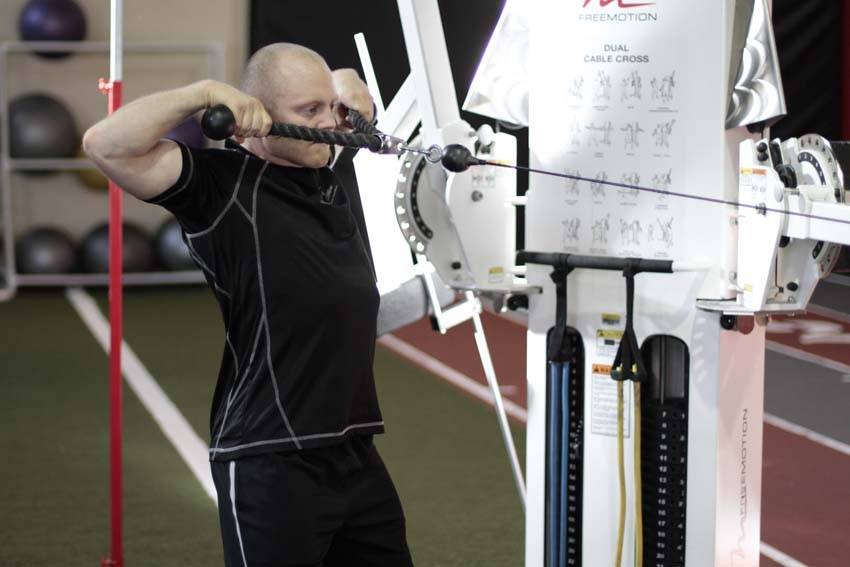
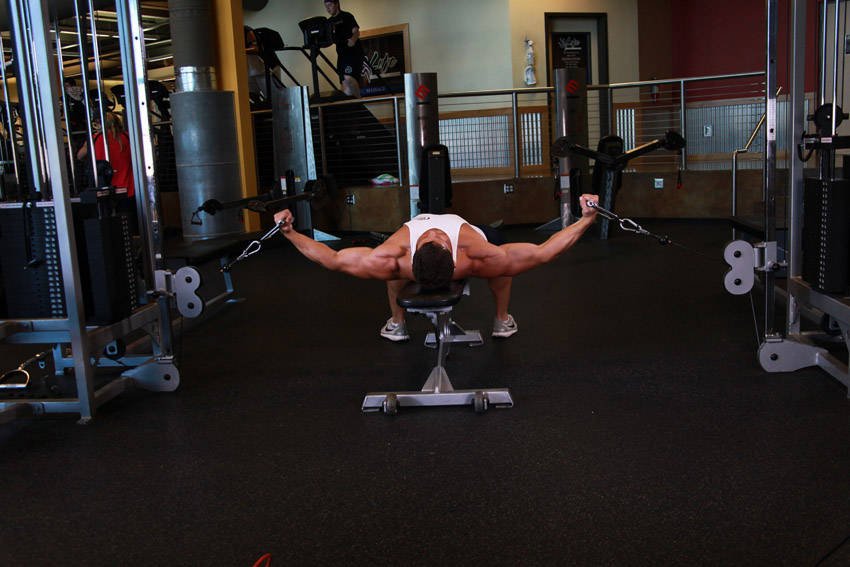
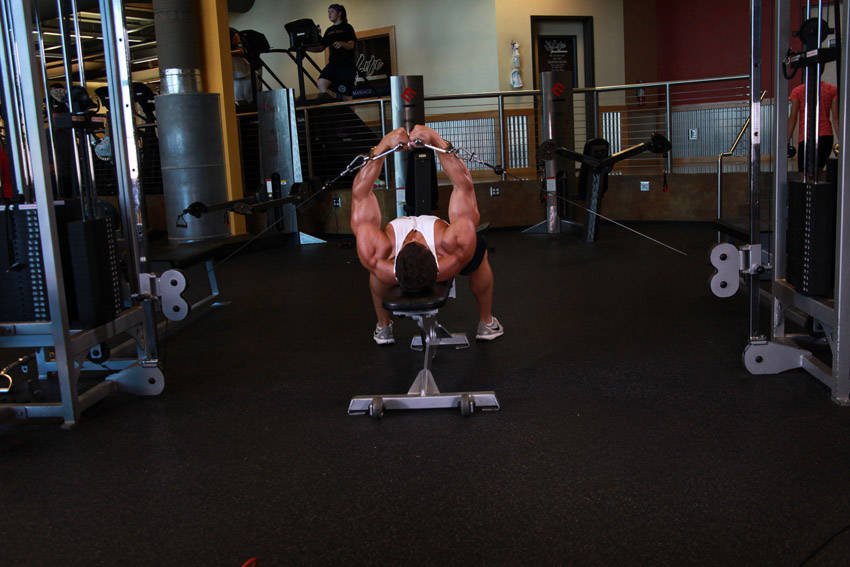
Set the cable pulley at roughly eye height and attach a rope. Stand or sit with a tall spine. Grip the rope with thumbs pointing toward you. Pull the rope toward your forehead, driving your elbows high and wide and rotating your upper arms outward at the end range. Pause for a second at peak contraction. This is a low-load movement; use a weight that lets you feel the rear delts and upper back, not your biceps.
Why this exercise: Rear delt and upper back health is essential for long-term pulling performance. This also acts as structural balance work to complement the heavier horizontal rows in this session.
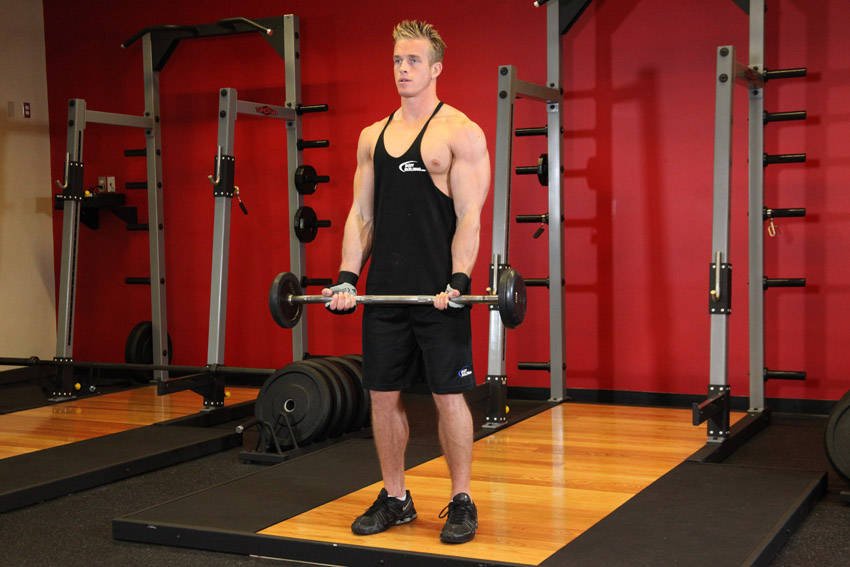
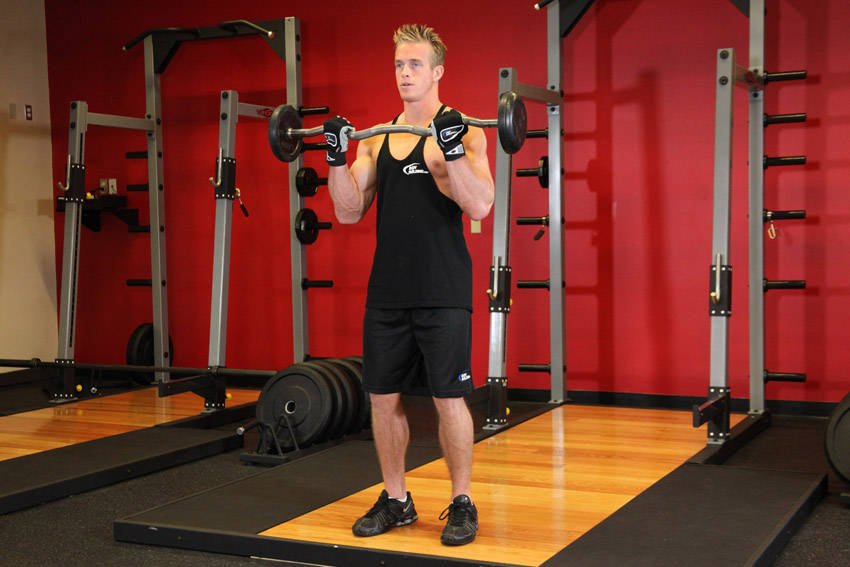
Stand with feet hip-width, grip the EZ bar at the inner camber. Pin your elbows to your sides throughout, they should not drift forward or flare. Curl smoothly to chin height, squeeze at the top, then lower under control over 3 counts. Avoid swinging the torso or letting the lower back hyperextend to initiate the rep.
Why this exercise: The EZ-bar camber reduces forearm supination stress on the elbow, making it the safer bilateral curl for volume work during re-entry, and a strong stimulus for the biceps brachii and brachialis, your primary arm mass builders.
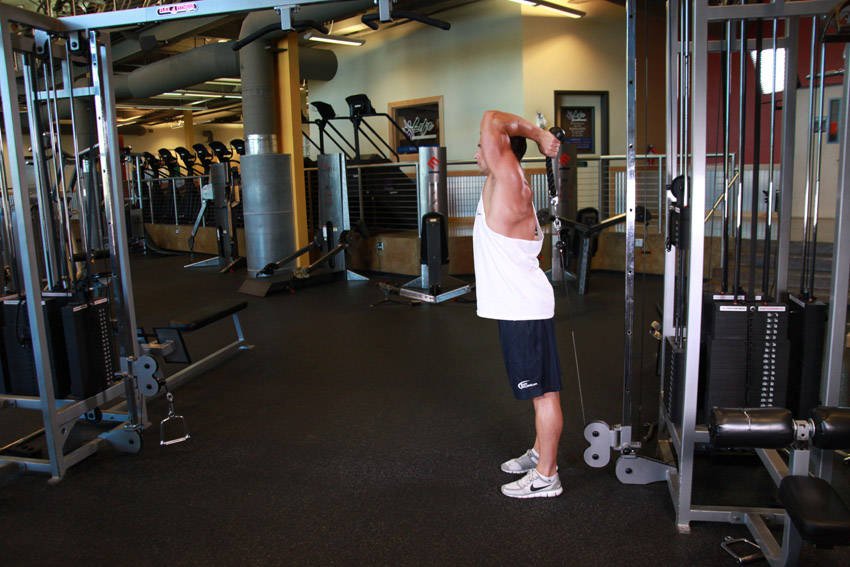
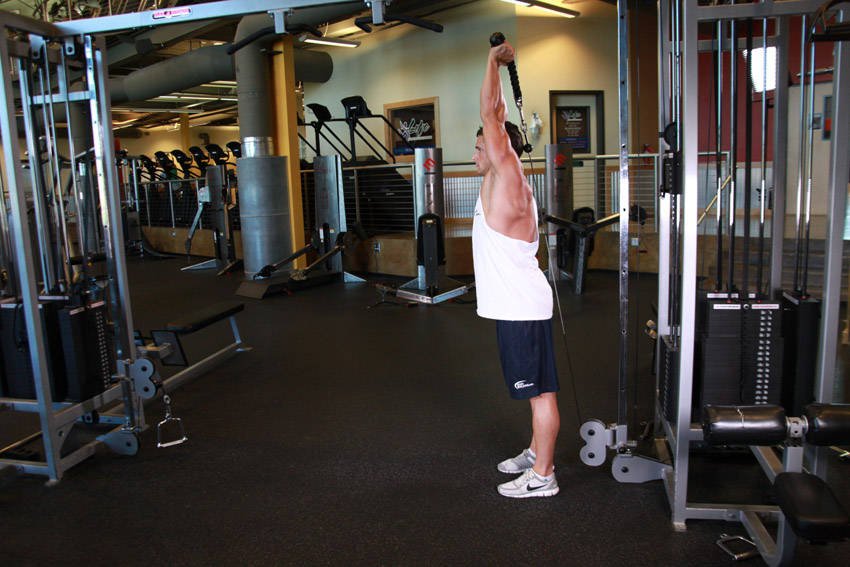
Set the cable low, grip the rope with a neutral grip and step a short distance away. Lean forward slightly from the hips, just enough to keep tension on the long head. Drive the rope upward by extending the elbows fully, then let the rope split and stretch down behind your head under control. The lean should come from the hips, not a flexed lumbar spine, so keep your core lightly braced.
Why this exercise: The overhead position puts the long head of the triceps under a meaningful stretch, which drives more hypertrophy than pressdown-only work, important for building arm size, and the cable keeps tension constant throughout the range. Chosen over a barbell skull crusher to remove any loaded spinal pressure from lying heavily loaded on a bench, keeping your lower back comfortable.
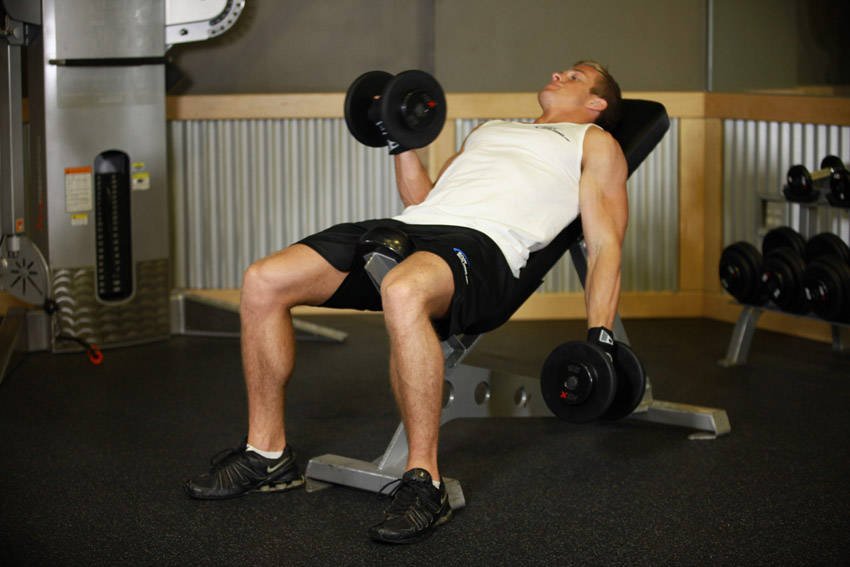
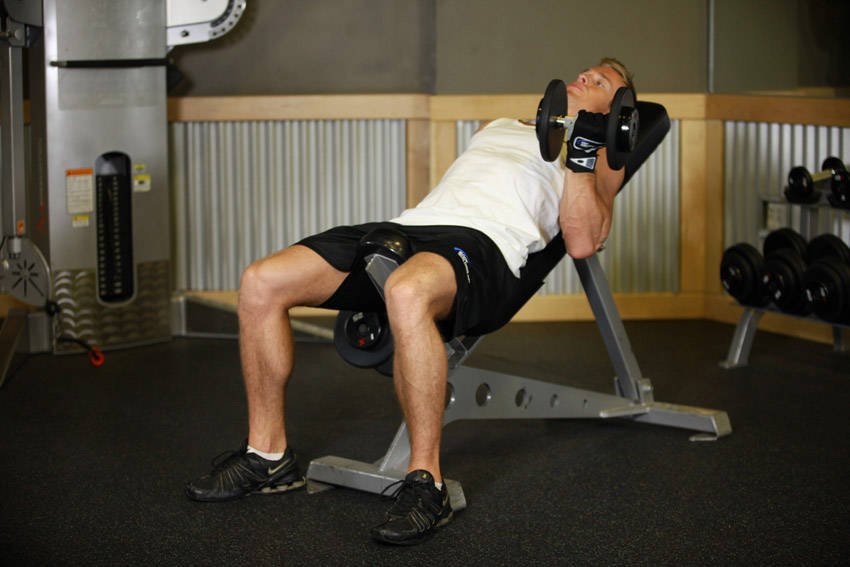
Set a bench to roughly 60 degrees. Sit back and let your arms hang straight down, this pre-stretches the long head of the biceps. Curl both dumbbells simultaneously (or alternate) without letting the shoulders hunch forward or the upper arm drift. At the top, pause briefly; on the way down, resist for a full 3-count stretch. The lower back stays supported against the pad throughout, no need to brace hard off the bench.
Why this exercise: The inclined position elongates the biceps long head at the start of every rep, which research consistently links to greater hypertrophy, a smart addition for someone targeting arm size, and the bench support removes any lower-back loading concern entirely.
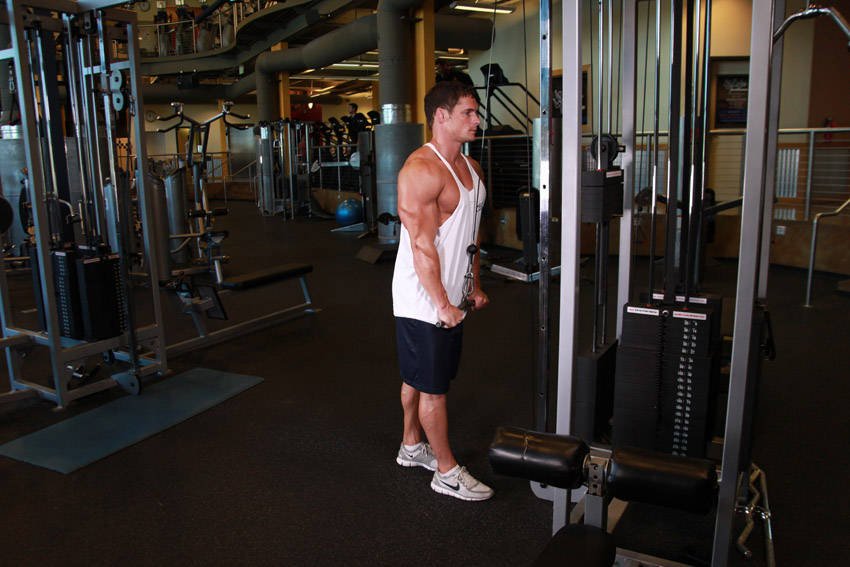
Set the cable high. Stand close, grip the bar or rope with arms at roughly 90 degrees to start. Keep your elbows welded to your sides and press down until your arms are fully extended, squeeze hard for a count. Return slowly to 90 degrees only; going higher risks the elbows drifting forward and losing tension. Keep a neutral spine; a very slight forward lean at the hips is fine, but don't round your lower back.
Why this exercise: Pressdowns are the ideal finishing movement for lateral and medial head triceps volume, high reps, constant cable tension, and zero spinal load, which fits your lower-back caution perfectly on a high-frequency arm day.
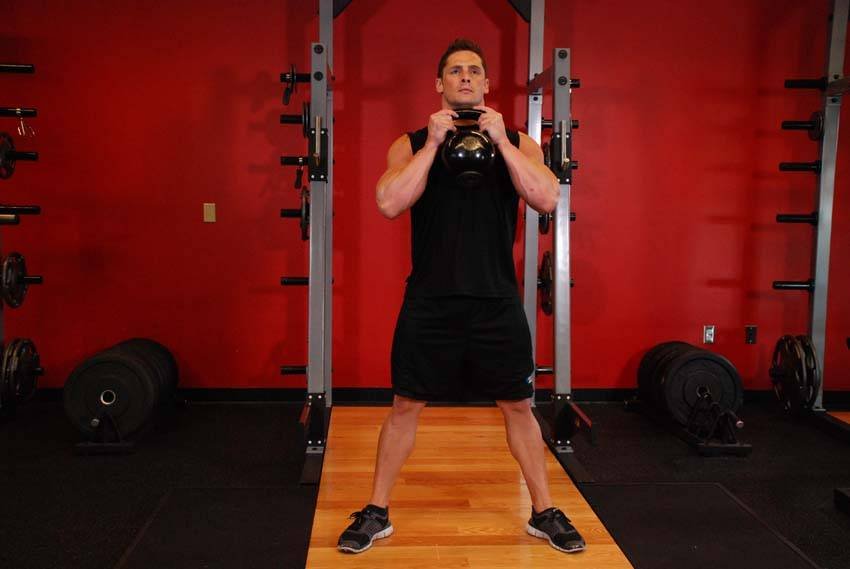
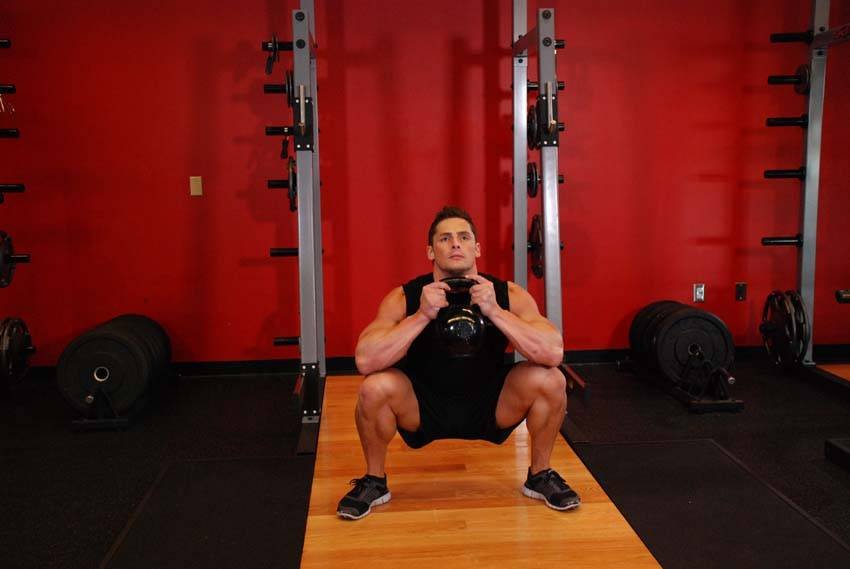
Hold a dumbbell or kettlebell vertically at your chest. Feet shoulder-width, toes slightly out. Sit the hips back and down, keeping your torso as upright as possible, think of the weight pulling your chest up, not forward. Drive through the whole foot to stand. A slow 3-second descent keeps tension on the quads. Stop just before your lower back rounds at the bottom.
Why this exercise: Front-loaded goblet position keeps the torso more upright than a barbell back squat, dramatically reducing compressive shear on your lumbar spine, ideal given your stiff lower back. Strong quad and glute builder for your muscle-building focus.
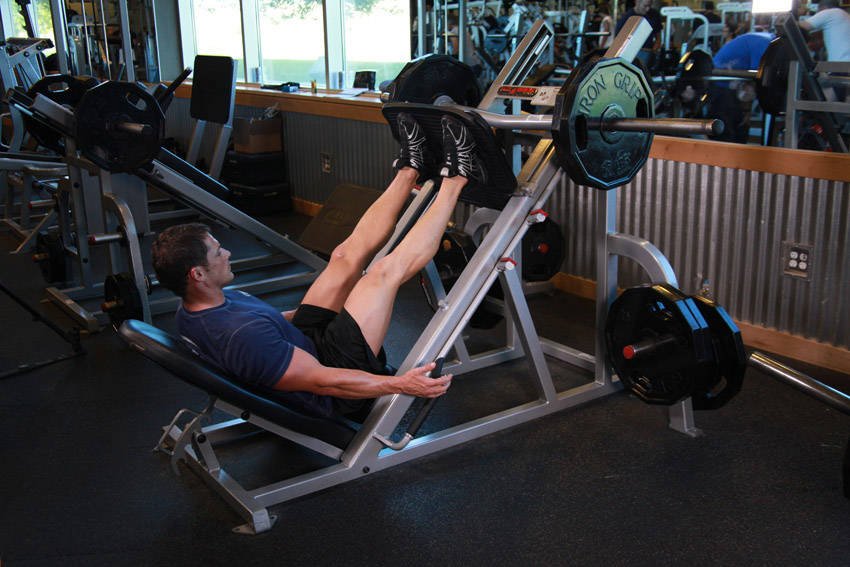
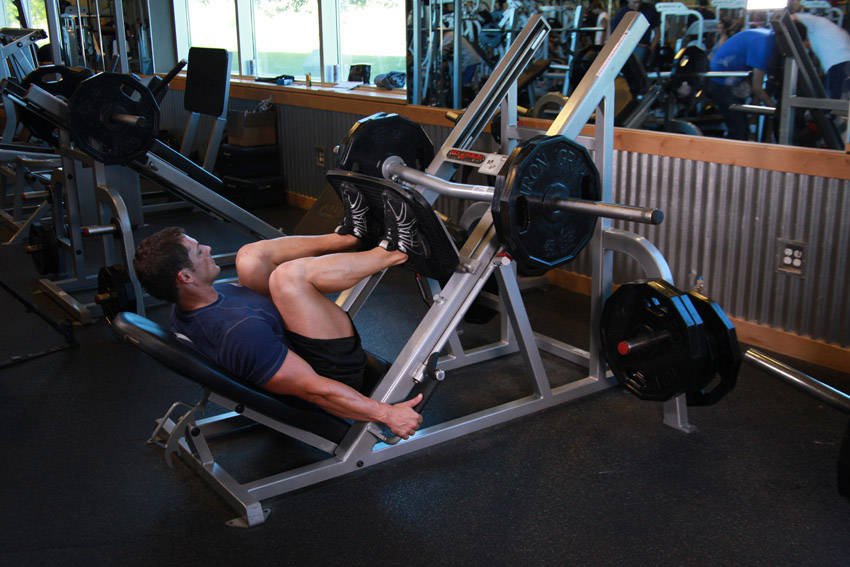
Set feet at mid to upper platform, wider stance, toes slightly out. Lower the sled until your thighs reach roughly parallel, then push evenly through the whole foot. Keep your lower back and sacrum flush against the pad the entire rep. Do not let the hips curl under at the bottom. Breathe in on the way down, exhale as you push.
Why this exercise: Adds significant quad and glute volume without spinal loading, the machine supports your back, making it a smart high-volume choice for a returning trainee with lumbar stiffness who wants to drive muscle growth in the legs.
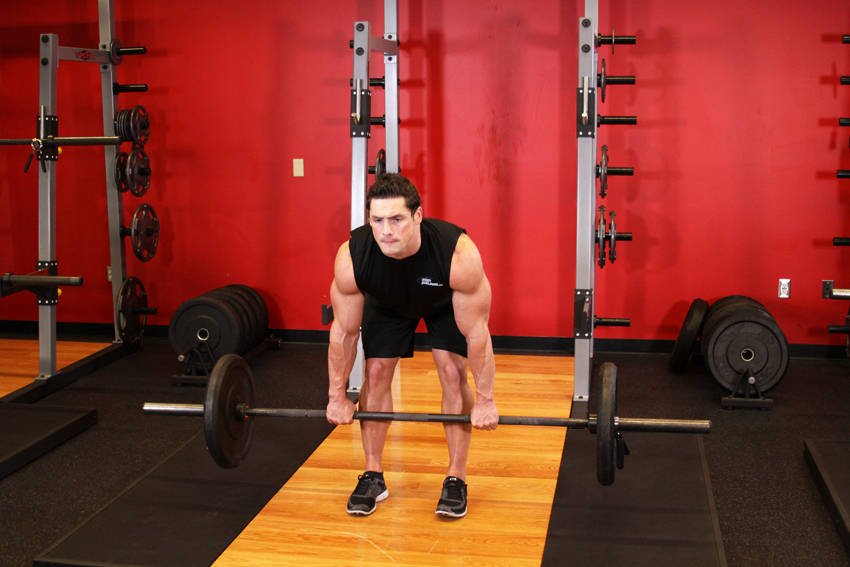
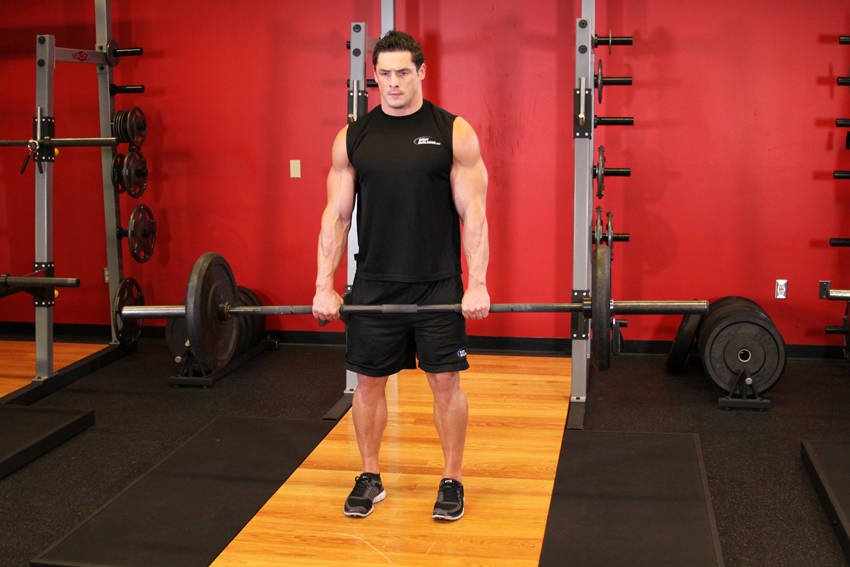
Hold two dumbbells in front of your thighs. Soft knees, then push your hips back as the dumbbells slide down your legs, feel the stretch build in your hamstrings. Stop when your torso is roughly parallel to the floor or just before your lower back rounds, whichever comes first. Squeeze the glutes to drive the hips forward and return. Keep weight light-to-moderate today: you are re-establishing the pattern, not maxing out.
Why this exercise: Dumbbell RDL instead of a barbell variation keeps load manageable and lets you self-regulate depth more easily, respecting your cautious lower back. Hamstring and glute stimulus is essential in a balanced lower-body day and supports your strength secondary focus.
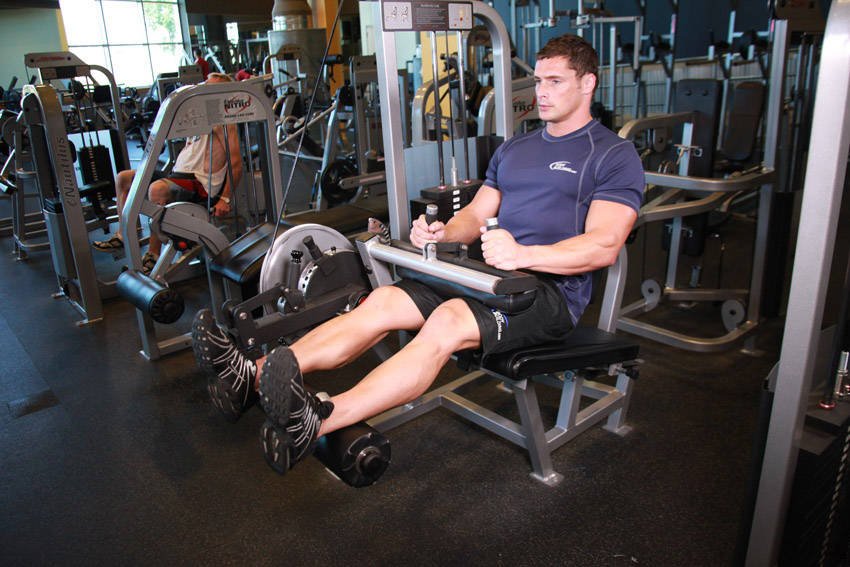
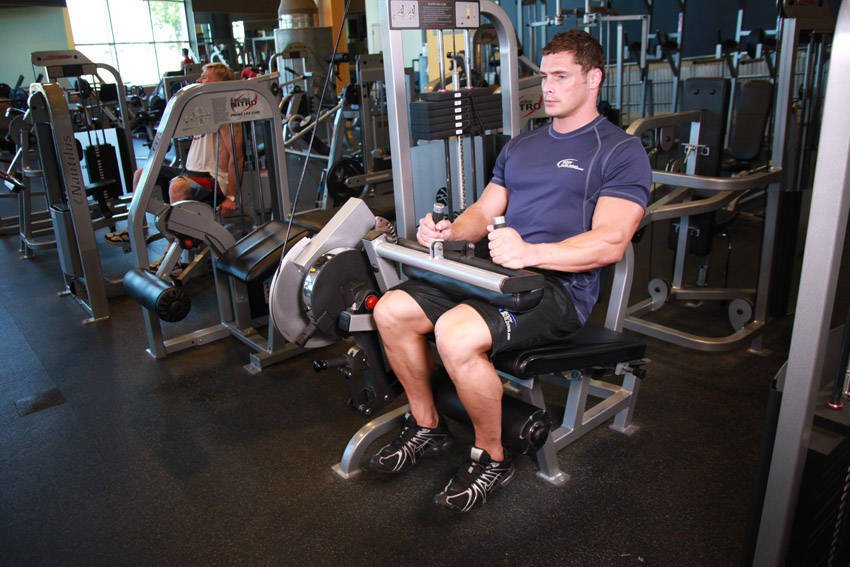
Adjust the pad so it sits just above the ankle. From full extension, curl the leg with control, no jerking. Pause briefly at peak contraction, then lower slowly over 2-3 seconds. Keep your hips pressed into the pad; do not let them rise as the weight comes up. Both legs together for now on the return phase.
Why this exercise: Isolates the hamstrings without any spinal loading, a safe, direct way to add hamstring volume for muscle growth after the hip hinge pattern of the RDL, rounding out your posterior chain work.
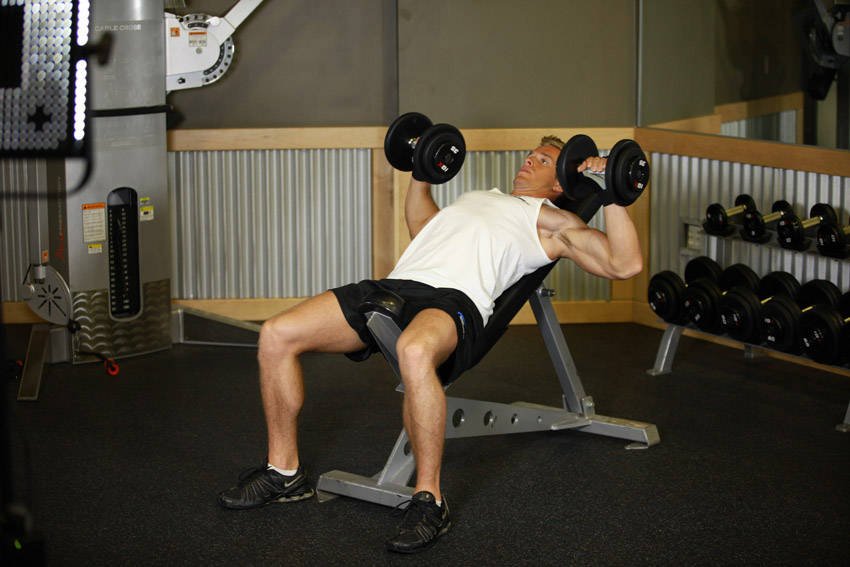
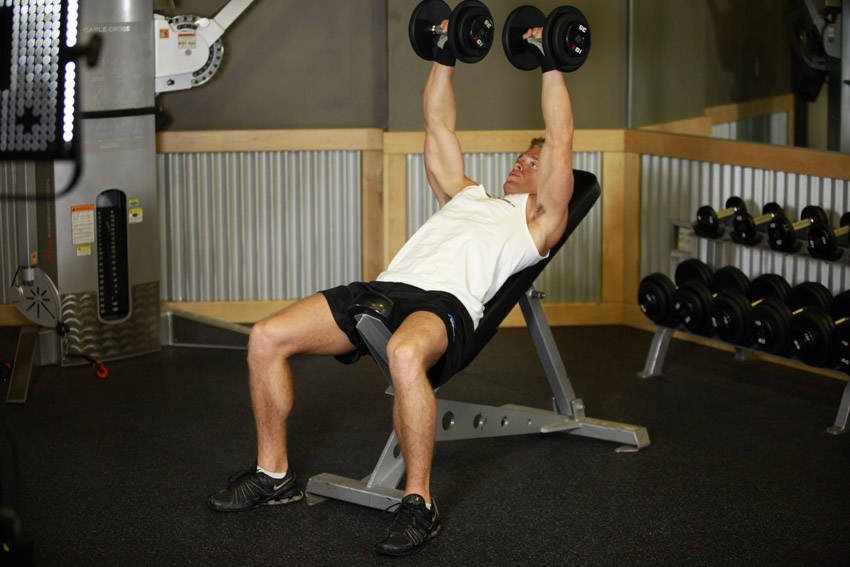
Set the bench to 30-45 degrees. Plant your feet flat, drive your upper back into the pad, and pinch your shoulder blades before you unrack. Lower the dumbbells to the outer chest with elbows at roughly 60-70 degrees from your torso, not flared out wide. Press in a slight arc back toward your face rather than straight up. Keep your lower back in a neutral, relaxed position throughout; no arching to force extra range.
Why this exercise: A moderate-incline dumbbell press is your primary chest and anterior delt builder for this session. Dumbbells allow each arm to move independently, reducing shoulder impingement risk and keeping spinal loading minimal, important given your lower back caution.
Set cables at mid or low anchor points. Stand slightly forward of the stack with a soft split stance for stability, this removes spinal load compared to a loaded machine. Keep a slight, fixed elbow bend throughout. Drive the handles together in a wide arc, feeling the pec stretch at the start and a strong squeeze at the midline. Control the return over 2-3 seconds. Do not let your shoulders round forward as the weight pulls back.
Why this exercise: Isolation work for the chest directly after the compound press maximises pec stretch and mechanical tension, a key hypertrophy driver, without adding axial load on the lower back.
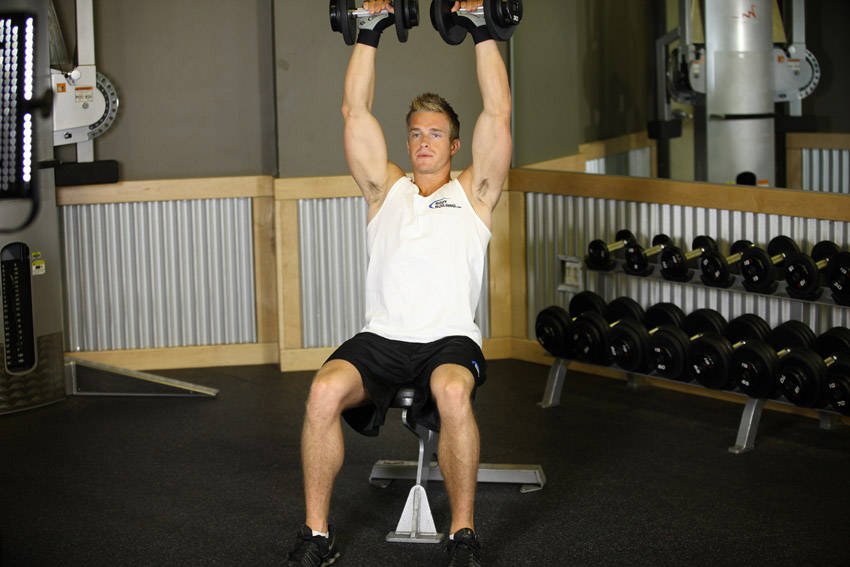
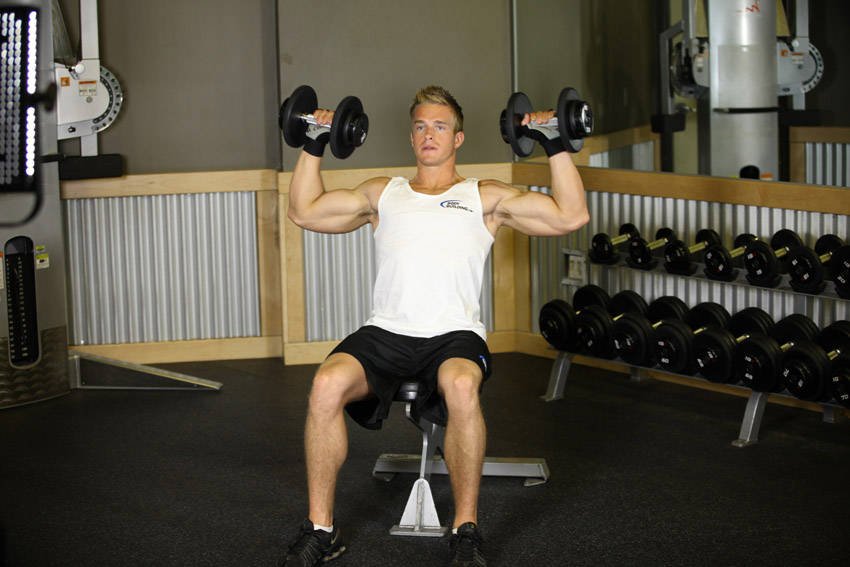
Sit upright on a bench with back support. Start with dumbbells at ear height, palms facing forward or at a slight neutral angle. Press directly overhead without letting the lower back hyperextend, actively keep the ribs stacked over the hips. Lower controlled to the start, elbows just below shoulder height. Breathe out on the press.
Why this exercise: Seated takes the lower back entirely out of the equation compared to standing overhead pressing, chosen specifically given your stiff lower back, while still delivering strong anterior and medial delt stimulus to round out the push session.
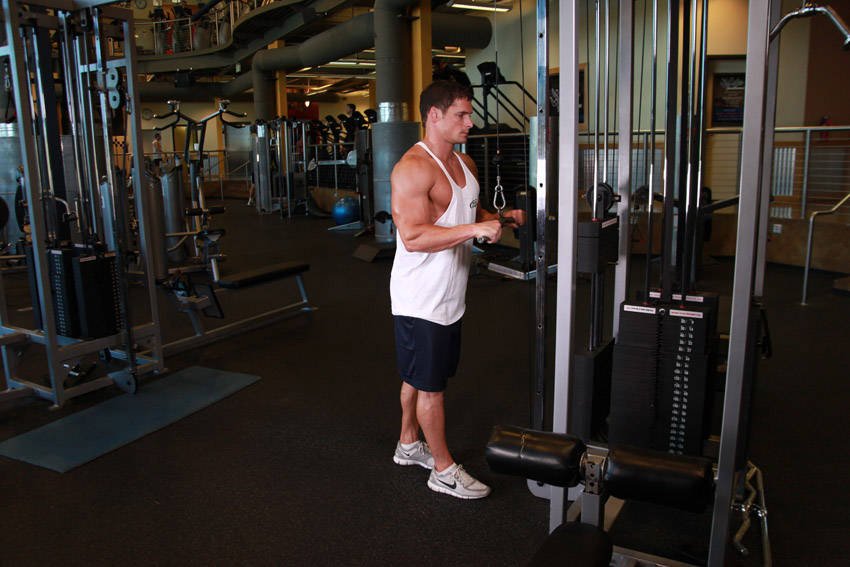
Stand facing the cable stack, cable set high. Grip the rope with a neutral grip, tuck your elbows firmly into your sides and keep them there for the whole set. Push down and splay the rope apart at the bottom for maximum triceps contraction. Do not lean into the movement to use bodyweight, keep the torso still. Controlled 2-second return.
Why this exercise: Triceps are a key push muscle and a requested focus area. The cable keeps constant tension through the full range, making it one of the most effective triceps builders, and the position is completely lower-back friendly.
Every session starts here, no exceptions. A proper warm-up primes your nervous system, gets blood into the working muscles, and, given your lower back stiffness, gives you a chance to loosen up before loading anything. Budget 8-10 minutes.
Row, cycle, or brisk walk on the treadmill. Keep it easy, you're raising your core temperature, not training. Nasal breathing throughout. If your lower back feels particularly stiff today, the bike or rower (set to a low resistance with a tall, neutral spine) works better than walking.
On all fours, hands under shoulders, knees under hips. Slowly arch your back up (cat) then let it sag gently (cow). Move at your own pace, this isn't a stretch, it's controlled segmental motion to wake up the spine. 8-10 slow reps. This is especially useful before back and lower-body days.
Sit on the floor, both legs bent at 90 degrees in a 90/90 position. Rotate your knees slowly from side to side, keeping your spine tall. 6-8 reps each side. Opens the hips and reduces the demand placed on the lumbar spine during your session.
Lie on your back, feet flat, knees bent. Drive through your heels and squeeze your glutes to lift your hips. Pause 2 seconds at the top. 10-12 reps. This doubles as prehab, activating your glutes reduces the compensatory load on your lower back throughout the session.
Use a light band. Stand tall, arms straight in front at shoulder height. Pull the band to your chest, squeezing your shoulder blades together. 15 reps. A quick shoulder and upper-back primer, especially useful before back and push days.
Alternate between big arm circles (10 forward, 10 backward) and standing thoracic rotations: feet hip-width apart, cross your arms over your chest and rotate your upper body left and right. 10 reps each side. Frees up the thoracic spine and shoulders before any upper-body work.
Before your first main lift, do 1-2 progressively heavier sets at 40-60% of your working weight. These are technique reps, not effort reps. They groove the pattern, confirm the movement feels right today, and protect you from jumping straight into a heavy load cold.
Your lower back stiffness is the priority here. You're returning after a break, which means connective tissue and stabiliser endurance have detrained faster than your movement skill. The goal of this section is to rebuild the deep spinal stabilisers, reinforce proper hip-hinge mechanics, and protect your lumbar spine across all four training days before fatigue sets in. Run these drills at the start of every session, after your general warm-up.
Lie on your back, feet on a wall or bench at 90 degrees at the hip and knee. Breathe in through your nose for 4 seconds, expanding your belly and ribcage laterally, then exhale fully for 6 seconds, letting your lower back gently flatten into the floor. This resets intra-abdominal pressure and teaches your diaphragm and deep core to work together, which is the foundation of a safe brace. This is especially important on Back and Lower days when spinal loading will be highest.
Lie on your back, arms reaching to the ceiling, hips and knees at 90 degrees. Brace your core lightly, press your lower back gently into the floor, then slowly lower the opposite arm and leg toward the floor without letting your lumbar spine lift. Return under control. This trains the deep spinal stabilisers (transverse abdominis and multifidus) in a completely spine-safe position, directly addressing the stiffness you flagged. Avoid this becoming a hip-flexor exercise by keeping the lower back in contact with the floor throughout.
Lie on your back, knees bent, feet flat. Drive through your heels to lift your hips, squeezing your glutes hard at the top and holding for 2 seconds. Weak glutes force the lower back to compensate during hinging and squatting patterns, which is a common driver of lumbar stiffness. Doing this before Lower and Back days primes the posterior chain in a low-risk way. Keep the movement at the hips, not the lumbar spine.
On hands and knees, move slowly between full lumbar flexion and extension, breathing out on the rounded position and in on the arched position. The goal is segmental control, not range: try to feel each vertebra move individually. This directly addresses the stiffness in your lower back by restoring natural spinal rhythm before load. Keep it slow and deliberate, especially in the first couple of weeks of your re-entry phase.
From the same hands-and-knees position, brace lightly and extend the opposite arm and leg simultaneously, holding 2-3 seconds before returning. Unlike a plank, the bird dog trains anti-rotation and anti-extension of the lumbar spine while also demanding coordination, making it highly specific to protecting your back during the pulling and pressing patterns in your week. Avoid any lumbar rotation by keeping your hips level throughout.
Sit on the floor with both knees bent at 90 degrees in front and behind you. Keep your chest tall and actively rotate your torso toward your front knee, then lean gently forward over it. Tight hips shift the load demand onto the lumbar spine during squatting and hinging, so this directly reduces lower back stress on Lower days. The active component (not just passive sinking) means you're building usable hip range, not just temporary flexibility.
Place a foam roller horizontally across your mid-back, support your head with your hands, and gently extend over the roller, moving it one segment at a time up the thoracic spine. A stiff thoracic spine forces the lumbar spine to compensate during back and push work. This is especially relevant on Back days where rows and lat work demand good thoracic mobility. Do not roll into the lower back.
Stand tall, soft knees, and hinge at the hips with a flat back, pushing your hips back as far as you can while maintaining lumbar neutral, then drive the hips forward to stand. This is a motor-pattern primer for Lower days, not a strength exercise at this stage. Because you flagged caution with heavy hinging, ingraining a clean hinge pattern here, before any load is added, protects your back and gives you a movement standard to hold yourself to during the session. Prefer this over loaded hinge variations in the early weeks of your re-entry.
Hold a resistance band at shoulder height with both hands shoulder-width apart, arms extended. Pull the band apart to your sides, squeezing the shoulder blades together at the end range, then return under control. This activates the mid and lower trapezius and rear deltoids before pressing work, counterbalancing the dominant pushing patterns on Push and Arms days. Strong scapular stabilisers also reduce impingement risk as volume builds back up.
Stand with your back flat against a wall, arms in a goalpost position. Slowly slide your arms overhead while keeping the back of your hands, elbows and lower back in contact with the wall. Slide back down. This grooves the full shoulder elevation pattern with proper scapular upward rotation, which is a prerequisite for safe overhead and upper chest pressing. If your elbows lose contact, stop at that point, as this is your current active range.
Extend one arm in front of you with the palm facing up, gently pull the fingers back with the other hand to stretch the forearm flexors; then flip the palm to face down and repeat for the extensors. With Arms days involving direct biceps and triceps work, keeping the forearm soft reduces elbow joint stress across the week. Run this before Arms and Push days.
Rest days are where your lower back recovers and your connective tissue adapts. The goal on these days is gentle movement, not training. Think of it as maintenance: keep the tissue mobile and the nervous system calm. Spend 20-30 minutes on the routine below. No intensity, no effort to push range, just controlled, easy movement.
Start with 5 minutes of low-effort movement to get blood flowing and gently load the spine in its most natural pattern. Walking is the best active recovery for the lumbar spine and is actively preferred over lying still on rest days.
Same drill from your session prehab, but done without any time pressure. Focus on breathing with each movement: exhale as you round, inhale as you arch. This should feel easy and relieving, not effortful.
From a kneeling position, sit back toward your heels and reach both arms forward, then walk your hands to the right to open the left lat and thoracic, then repeat the other side. This passively decompresses the lumbar spine and stretches the lats, which connect directly to the thoracolumbar fascia and often contribute to lower back stiffness when tight.
Same position as the active version in your session prehab, but here you simply sit and breathe, letting the hip passively open. On a rest day there is no need for the active rotation component. Tight hip flexors and external rotators are a common driver of lower back stiffness, so keeping these tissues long on off days directly supports how you feel at the start of the next session.
Lie on your back and gently pull one knee toward your chest, keeping the other leg relaxed on the floor. Hold, then switch. Finish by drawing both knees in together. This passively decompresses the lumbar facet joints and is one of the simplest, most effective techniques for reducing morning or residual stiffness in the lower back.
Lie on your back, cross one ankle over the opposite knee, and either let gravity open the hip or gently draw the legs toward your chest. The piriformis and deep hip rotators connect closely to the sacrum and lumbar spine. Keeping them supple on rest days reduces the tightness that often shows up as lower back stiffness at the start of a training week.
A lighter, longer version of the session drill. Move slowly up and down the mid and upper back only, pausing at any stiff segments. Do not roll into the lumbar spine. This reduces thoracic stiffness that accumulates from sitting most of the day, directly reducing how much your lower back has to compensate during the next training session.
Lie on your back in the same 90-90 position from your session prehab and finish with slow, full breathing cycles. This shifts your nervous system toward a parasympathetic state, which is the optimal environment for tissue repair. Think of it as signalling to your body that the work is done and recovery can begin.
Your nutrition goal is body recomposition leaning toward a fat loss deficit, which pairs well with muscle building at your intermediate level, especially as you're returning after a break. That return phase actually gives you an edge: muscle memory accelerates your re-sensitisation to training, and a moderate deficit won't hammer your recovery the way it might for an advanced athlete pushing high volume. Keep protein high to protect the muscle you're rebuilding while the deficit does its job on fat. Spread your intake across 4 or 5 meals to hit your protein targets consistently, since hitting your daily protein total matters far more than obsessing over exact meal timing. Prioritise whole, minimally processed foods for the bulk of your carbs and fats, and think of each meal as a protein-first decision. Always double-check ingredients against your own allergies.
These meals are examples, not fixed rules. Each slot's options hit similar macros, so rotate and swap them freely to keep things varied. Picking one option per slot comes to roughly your daily target; adjust portions up or down to hit your number exactly. Always check labels against your own dietary needs.
Supportive, not essential, food comes first. These are the ones with real evidence behind them.
The most well-researched supplement available. Increases phosphocreatine stores to boost strength and power output, and supports lean mass retention during a deficit.
A convenient, fast-digesting protein source to top up your intake on training days or when whole-food protein is hard to hit.
Mostly sedentary indoor lifestyles lead to low vitamin D in a large portion of the population. Supports testosterone, immune function, and bone health.
Supports sleep quality, muscle recovery, and nervous system function. The glycinate form is gentler on the stomach and absorbs well.
Reduces exercise-induced inflammation, supports joint health, and has solid cardiovascular evidence. Algae-based is the plant-derived source of the active EPA/DHA forms, making it a clean alternative to fish oil.
Meaningfully improves strength, endurance, and mental focus during sessions. Keep it earlier in the day to protect sleep quality.
Read-once material, the why behind the plan. Tap any section to open it.
Muscle hypertrophy in a deficit is absolutely achievable for a returning intermediate, because muscle memory and a solid protein intake mean your body holds onto lean mass while shedding fat.
Each week, you're looking to add a rep, tighten your rest slightly, or advance a variation once all sets hit target reps with good form and 1-3 reps left in the tank. That steady upward nudge is what tells your body to hold onto muscle even when calories are below maintenance.
Slowing the lowering phase (2-3 seconds down) creates more mechanical tension and micro-damage than rushing through it. This is one of the most reliable ways to maximise muscle stimulus per set, especially important when total weekly volume is capped by a 4-day schedule.
Your chosen focus areas get extra sets relative to the other muscle groups. Back sits at the top of the priority list with a dedicated day plus carry-over from Pull patterns; arms get their own day for direct bicep and tricep work. Spreading that volume across multiple sessions helps keep each session within the 45-minute window.
A stiff lower back responds poorly to heavy axial loading and end-range flexion under load. Substitutions are noted on each relevant exercise. The prehab block in every session targets the supporting muscles (glutes, deep core, hip flexors) so the lower back gradually stops having to do work it shouldn't.
Building muscle while in a fat-loss phase is absolutely achievable at your intermediate level, especially coming back after a break. The key is hitting the right rep ranges, accumulating enough volume on your priority muscles, and using tempo to make every rep count. Here is how to apply those principles across your 4 training days.
Your primary hypertrophy window sits at 8-12 reps for compound movements and 10-15 reps for isolation work. Both ranges drive growth, and mixing them across a session gives you mechanical tension from heavier loads alongside the metabolic stress of higher reps. For the strength secondary focus, anchor one compound lift per session in the 5-6 rep range at a higher load before dropping into your hypertrophy sets. This keeps strength stimulus alive without turning every session into a heavy grind.
Target 14-18 working sets per week for Back and Arms as your named priority areas. Other muscle groups (chest, shoulders, legs) sit at a maintenance-to-growth range of 10-14 sets. With 4 training days, that volume is very achievable. After your re-entry ramp (covered in the Re-entry ramp section), you will be working in that range comfortably. During the ramp, stay toward the lower end of these numbers, 8-10 sets per muscle, and let your body catch up.
Use a 3-1-1-0 tempo as your default: 3 seconds on the lowering phase, 1-second pause at the bottom, 1 second on the lifting phase, no pause at the top. On isolation work for arms (curls, pushdowns, extensions), try 3-1-2-0, a slightly slower lift with a deliberate squeeze at peak contraction. This is not about going slow for its own sake; the longer eccentric increases muscle damage and time under tension, both strong drivers of hypertrophy. Rest 60-90 seconds between hypertrophy sets, 2-3 minutes on your heavier strength-focused sets.
Back is your first named focus area. Bias your back day toward vertical pulls (lat-focused) and horizontal rows (mid-back and rhomboid-focused) in roughly equal measure, both angles are needed for complete development. Aim for 2-3 pulling exercises on your dedicated back day. A useful rule of thumb: if a set row feels easy on the lower back, it probably is too light or the hinge is too deep. Keep your torso angle between 45 and 75 degrees on bent-over work given your lower back stiffness, or favour supported variations (chest-supported row, cable row seated) where the spine is unloaded. The injury section covers specific substitutions.
Arms are your second focus area. Your dedicated arms day gives you the ideal setup: biceps and triceps can both be trained with high frequency here because they recover quickly. For biceps, vary grip angle across the week: supinated curls hit the long and short head together, hammer curls emphasise the brachialis (adds thickness and pushes the biceps peak up visually). For triceps, prioritise overhead extension movements (long head stretch) alongside pushdowns. Target 6-8 direct arm sets each for biceps and triceps on your arms day, and they will get additional indirect work on your back and push days respectively. Keep reps in the 10-15 range here; arms respond well to slightly higher rep, higher-pump work.
Most sets should finish with 1-3 reps left in the tank (1-3 RIR). You do not need to grind to failure to grow, and during a fat-loss phase with a calorie deficit, recovery is already slightly compressed, unnecessary junk fatigue works against you. On isolation exercises at the end of a session, going to technical failure occasionally is fine. On compounds, stay conservative and trust the volume to do the work.
Each week, aim for one of the following: add 1-2 reps across your sets, or add a small load increment (2.5-5 kg) once you can hit the top of the rep range on all sets with good form and 1-2 RIR to spare. If reps dropped or form broke, hold the weight and clean up the movement. If you missed target reps by more than 2, consider dropping the load slightly rather than grinding through bad reps. This simple rule keeps you progressing without chasing numbers that hurt you.
You flagged a stiff lower back with caution around heavy hinging and loaded spinal flexion. That's a smart flag, training into irritation slows everything down. The approach here is to keep your back strong and functional while avoiding positions that load it in ways it's not ready for yet, especially during your re-entry phase.
Avoid two things until your back is consistently pain-free and mobile: heavy loaded hinging (conventional deadlifts, Romanian deadlifts with a significant load) and loaded spinal flexion (weighted sit-ups, crunches with load, good mornings). These aren't permanently off the table, they're paused while you rebuild the foundation. Prefer exercises where your spine stays in a neutral, braced position throughout. If anything in a session produces pain (not just a stretch or mild fatigue, but actual pain), stop that movement and note it.
When a session would normally include a conventional deadlift or heavy hinge pattern, prefer a trap-bar deadlift or a cable pull-through instead, both train the same posterior chain with far less shear on the lumbar spine. For any row variation that requires a deep forward lean under load (e.g. bent-over barbell row), prefer a chest-supported dumbbell row or a cable seated row, which removes the need for your lower back to isometrically stabilise a long lever. Avoid loaded good mornings entirely for now. Each session notes its own substitutions where relevant.
This takes about 5 minutes and should precede your regular warm-up activation.
1. 90/90 Hip Rotations, 5 reps per side, slow and controlled. Sit on the floor with both knees bent to 90 degrees. Rotate your hips to lower both knees toward the floor on one side, then rotate back and lower to the other. This mobilises the hips and reduces the tension that often pulls on the lumbar spine.
2. Cat-Cow, 10 slow reps. On hands and knees, gently arch and round your thoracic spine in a controlled rhythm. This is spinal mobilisation, not a strength exercise, keep it pain-free and smooth. Focus on moving through your mid-back, not just your lower back.
3. Dead Bug, 3 sets of 6 reps per side. Lie on your back, arms pointing to the ceiling, hips and knees at 90 degrees. Slowly lower one arm overhead while extending the opposite leg, keeping your lower back pressed flat to the floor. Return and switch. This builds deep core control (transverse abdominis) without any spinal flexion or extension under load, exactly what your back needs right now.
4. Glute Bridge, 3 sets of 12 reps. Flat on your back, feet hip-width, drive through your heels to lift your hips to a straight line from knees to shoulders. Squeeze at the top for 2 seconds. Waking up your glutes reduces the demand on your lumbar erectors in every compound movement you do.
Your core work should be anti-movement focused right now, not movement-based. That means planks, side planks, dead bugs, pallof presses, and carries rather than crunches, sit-ups, or any flexion-dominant exercise. Anti-movement core training, resisting rotation, resisting extension, resisting lateral bend, builds the spinal stability that actually protects your lower back under load. It's more functional for lifting anyway. Loaded flexion (like a weighted crunch) is off the table for now.
Mild stiffness at the start of a session that clears up as you warm up is normal and not a red flag. Sharp pain, pain that worsens through a set, or pain that lingers for hours after a session, those are signals to stop the aggravating movement and reassess. Don't try to train through those. Your re-entry ramp (covered in the Re-entry ramp section) naturally keeps loads conservative for the first couple of weeks, which gives your lumbar structures time to adapt before intensity climbs. This is the right time to be patient, the back responds well when you let it rebuild systematically rather than testing it too soon.
Proper intra-abdominal pressure is one of the most protective things you can do for your lower back during any loaded movement. Before each rep of a compound exercise, take a breath into your belly (not your chest), brace your core as if you're about to take a punch, and hold that brace through the rep, exhaling only after you've cleared the hardest part. For your experience level on compound lifts, this Valsalva-style brace is appropriate. If you have any cardiovascular concerns or high blood pressure, switch to continuous breathing instead (exhale during the effort). This one habit, applied consistently, does more for lower back protection than most accessories.
You're returning after a break, which means your muscles remember the movements (thanks to muscle memory) but your tendons, joints and connective tissue need a bit longer to catch up. Jumping straight back to your previous training weights is the fastest route to an injury that sidelines you again. This 2-3 week ramp is your bridge back to full programming, treat it seriously and you'll be training at full intensity sooner, not later.
Skill and neural efficiency return quickly, often within a session or two. Connective tissue adaptation is much slower. That mismatch is exactly when people get hurt: the movement feels easy, so they push hard, but the tendons haven't caught up yet. A deliberate ramp closes that gap before full-intensity work begins.
Use reps in reserve (RIR) as your guide rather than chasing a specific weight. During the ramp phase, every working set should finish with at least 4-5 reps still in the tank, genuinely comfortable, not grinding. If a set feels close to failure, that's a signal to reduce the load, not push through it. This conservatism is intentional: the goal of these weeks is movement quality and tissue preparation, not performance.
Volume: Start at roughly 50-60% of what you'd normally do. If your target is 4 working sets per exercise at full programming, do 2-3 sets during the ramp.
Load: Begin around 60-65% of what your last working weight was (or your best estimate of it). Add load only when every set feels smooth and controlled with 4-5 RIR to spare.
Progression within the ramp: If week 1 feels genuinely easy and your form is solid, nudge the load up 5% for week 2. The ramp phase ends when you're hitting full session volume with good form at around 2-3 RIR, that's your green light to enter the main block.
With a stiff lower back, the ramp phase does double duty: it rebuilds general capacity and gives your lumbar area time to adapt before heavier hinging or axial loading. During these early weeks, prefer controlled tempos on any hinge-pattern work, keep loads conservative, and stop a set early if you feel any sharpness or clamping in the lower back, that's not a normal training sensation. The Targeted Prehab section has the specific warm-up drills and substitution rules to follow across all phases, including this one.
The most common mistake returners make is treating these weeks as wasted time. They're not. Every session in this phase is building the foundation your main block runs on. Leaving the gym feeling like you had more in the tank is the correct outcome. The discomfort of under-training for 2-3 weeks is far less costly than the setback of an injury in week 1.
You're clear to enter full programming when all of the following are true: you've completed at least 2 full weeks of ramp sessions, your working sets feel smooth with 2-3 RIR at moderate load, your lower back is not flagging during or after sessions, and your recovery (sleep, soreness, energy) feels stable. If any of those aren't ticked, extend the ramp by a week rather than rushing it.
At 34 and intermediate level, you're ready to use a proper brace on your heavier compound sets. Breathing and bracing well isn't just a performance detail, on a returning trainee with a stiff lower back, it's one of the most effective things you can do to protect your spine under load.
Before you initiate the rep, take a big breath in through your nose and direct it into your belly, not your chest. Your ribcage should expand all the way around, front, sides, and back. You should feel your torso 'inflate' like a cylinder.
Before the weight moves, brace your abs as if someone is about to punch you in the stomach. Don't hollow out or suck in, create 360-degree tension around your trunk. This is intra-abdominal pressure, and it turns your torso into a rigid column that protects the spine.
Keep the brace locked through the full rep, do NOT exhale during the difficult portion. Releasing breath mid-rep drops the intra-abdominal pressure exactly when you need it most. Hold until you clear the sticking point.
Once you're past the hardest part of the rep (e.g. past the knee on a deadlift, past the halfway point on a row), you can exhale slowly and controlled. Then breathe in and re-brace before the next rep, don't just breathe casually between reps on a heavy set.
Use the full Valsalva-style brace above on every heavy rep. This includes your back and lower-body days especially, where spinal loading is highest. Given your lower back history, treat this as non-negotiable, not optional.
For lighter, single-joint movements, continuous breathing is fine and simpler: exhale on the exertion (the curl/pull/press) and inhale on the return. No need to hold your breath here, just keep a gentle core tension throughout.
Breathe naturally through your nose. No bracing needed during low-intensity work. Use these minutes to settle into a relaxed breathing rhythm before the working sets begin.
Practice the brace on lighter loads first, it's a skill and it takes a few sessions to feel natural. Don't go heavy until the brace feels automatic. Getting this right before the weight climbs is one of the best things you can do for your lower back.
Breathe through your nose during your warm-up, mobility work, and any low-intensity cardio. Nasal breathing is calmer on the nervous system and helps you stay in an aerobic zone. Switch to mouth breathing only when intensity genuinely demands it.
Important: the Valsalva brace causes a temporary spike in blood pressure and intra-thoracic pressure. If you have high blood pressure, a diagnosed heart condition, or any cardiovascular concerns, do not use breath-holding during lifts. Use continuous breathing instead (exhale on exertion), and consult your doctor before performing heavy loaded exercise. When in doubt, get checked out.
You're returning after a break, which changes the recovery equation significantly. Your nervous system and connective tissue decondition faster than your skill and muscle memory, so the first few weeks will feel hard even at moderate loads. Recovery is where adaptation actually happens. Protect it.
Aim for 7-9 hours every night. A single night of poor sleep measurably drops testosterone and recovery quality. With a desk-based job and 4 training days per week, sleep is genuinely the highest-impact thing you can do outside the gym. Prioritise it over any other recovery tool.
Your re-entry section covers this in detail, but the core idea is simple: expect to start at 50-60% of your previous working weights and build from there. Soreness in the first 1-2 weeks is normal, it doesn't mean you undertrained. Muscle memory is real; your strength will come back faster than it left. Don't rush it.
Training Monday, Tuesday, Thursday and Friday with Wednesday, Saturday and Sunday off gives your body clear windows to recover between sessions. Wednesday in particular acts as a mid-week buffer between your upper-body days and your lower/push days. Respect the rest days, they're part of the program, not gaps in it.
On Wednesday and at least one weekend day, 20-30 minutes of easy movement, a walk, light cycling, gentle stretching, will reduce soreness and keep blood moving through recovering tissue better than total stillness. Keep it low-effort: you're enhancing recovery, not adding training stress.
Your lower back may accumulate more fatigue than the rest of you, particularly after back and lower-body days close together (Monday and Thursday). If stiffness builds across the week, add an extra 5 minutes of gentle cat-cow, hip 90/90s, or a prone child's pose stretch on rest days. These are not rehab, they're maintenance. If pain increases rather than stiffness, stop and get it assessed.
This is an 8-week block. Week 8 is a planned deload: cut your working volume by roughly 40-50% while keeping weights close to where they were. Think of it as a scheduled easy week, not a week off. Regular deloads let you push harder in the weeks before them, and they protect against the slow accumulation of fatigue that stalls progress or leads to niggles.
Returning trainees often misjudge where they are. Signs you need more recovery rather than more training: persistent soreness lasting beyond 72 hours, strength dropping from session to session, poor sleep despite tiredness, or a general lack of motivation to train. Any of these appearing consistently is a signal to reduce load or add a rest day, not push through.
The plan only works if you keep showing up. A few things that matter more than any single workout:
Solid sessions most weeks out-perform one perfect week followed by burnout. Aim for repeatable, not heroic.
Focus on the muscle and the movement on every rep. Deliberate effort recruits more and builds the skill faster.
Jot down what you did. Seeing progress on paper is one of the strongest motivators there is.
A bad session or a missed week isn’t failure, it’s normal. Pick the plan back up where you left off.
Common snags and what to do about them.
Hold the current variation. Add a rep, or slow the lowering phase, before moving to the harder version.
Check sleep and protein first, and make sure you’re leaving 1-3 reps in reserve rather than going to failure every set.
Resume where you left off. Don’t cram two workouts into one day to “catch up.”
Take a deload week (cut volume ~50%), then come back and push again. Plateaus usually mean accumulated fatigue.
Keep the warm-up and the working sets; trim accessory work. Something beats nothing.
If you do nothing else, do these. They’re most of the results.
Make something harder most weeks: a rep, a set, or a tougher variation.
Non-negotiable. This is when the adaptation actually happens.
The daily target is the foundation everything else is built on.
Five minutes that protects your training for years.
Work around it, especially your lower back. Pain is a stop sign, not something to push past.
Most days, most weeks, for months. Consistency is the real secret.